
https://github.com/callicoder/spring-boot-react-oauth2-social-login-demo 의 프로젝트를 참고하여 소셜로그인 과정을 정리해보았다.
GitHub - callicoder/spring-boot-react-oauth2-social-login-demo: Spring Boot React OAuth2 Social Login with Google, Facebook, and
Spring Boot React OAuth2 Social Login with Google, Facebook, and Github - GitHub - callicoder/spring-boot-react-oauth2-social-login-demo: Spring Boot React OAuth2 Social Login with Google, Facebook...
github.com
1. GOOGLE_AUTH_URL 이동
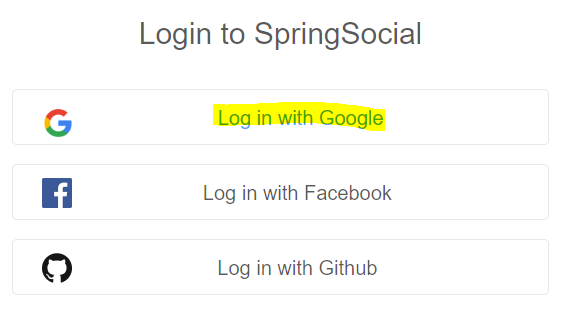
누르면 오른쪽 링크로 이동됨. http://localhost:8080/oauth2/authorize/google?redirect_uri=http://localhost:3000/oauth2/redirect
아마 /oauth/authorize/google 까지가 위 구글 소셜 로그인 페이지고 로그인이 완료되면 redirect_uri의 주소로 이동한다는 뜻인 듯??
그러면 SecurityConfig에서 oauth2Login으로 필터됨.
참고
2. Redirect
SecurityConfig.java
http
	.cors()
	    .and()
	.sessionManagement()
	    .sessionCreationPolicy(SessionCreationPolicy.STATELESS)
	    .and()
	.csrf()
	    .disable()
	.formLogin()
	    .disable()
	.httpBasic()
	    .disable()
	.exceptionHandling()
	    .authenticationEntryPoint(new RestAuthenticationEntryPoint())
	    .and()
		.authorizeRequests()     // 접근 권한 설정
	    .antMatchers("/auth/**", "/oauth2/**")      // 이런 경로로 들어오면
	        .permitAll()       // (인증 안받아도) 모두 접근 허용
	    .antMatchers("/",
	        "/error","/favicon.ico","/**/*.png",
	        "/**/*.gif","/**/*.svg","/**/*.jpg",
	        "/**/*.html","/**/*.css","/**/*.js")
	        .permitAll()       // 모두 접근 허용 22
	    .antMatchers("/info/**")
	        .permitAll()       // 모두 접근 허용 33
	    .anyRequest()       // 그 외 모든 경로는
	        .authenticated()       // 인증되어야 함
	    .and()
	.oauth2Login()      // Oauth 로그인 설정
	    .authorizationEndpoint()     // 소셜 로그인 권한 받기
	        .baseUri("/oauth2/authorize/**")     // 이런 경로로 오면
	        .authorizationRequestRepository(cookieAuthorizationRequestRepository())
	        .and()
	    .redirectionEndpoint()       // 리다이렉트
	        .baseUri("/oauth2/callback/**")     // 이런 경로로 오면
	        .and()
	    .userInfoEndpoint()
	        .userService(customOAuth2UserService)
	        .and()
	    .successHandler(oAuth2AuthenticationSuccessHandler)     // Oauth 로그인 성공하면
	    .failureHandler(oAuth2AuthenticationFailureHandler);     // Oauth 로그인 실패하면

// Add our custom Token based authentication filter
http.addFilterBefore(tokenAuthenticationFilter(),      // jwt 토큰 핸들러
UsernamePasswordAuthenticationFilter.class);(* 서버 포트를 8443으로 설정해두었음)
http://localhost:8443/oauth2/authorize/google?redirect_uri=http://localhost:3000/oauth2/redirect 는 “oauth2/authorize/**” 패턴이니까
.oauth2Login()      // Oauth 로그인 설정
	    .authorizationEndpoint()     // 소셜 로그인 권한 받기
	        .baseUri("/oauth2/authorize/**")     // 이런 경로로 오면
	        .authorizationRequestRepository(cookieAuthorizationRequestRepository())
.and()여기서 걸린다.
스프링에서 알아서 로그인 서버와 통신을 끝낸 뒤에, 인증에 성공하면 access_code와 함께 redirect_url로 돌아간다.
application.yml
security:
    oauth2:
      client:
        registration:
          google:
            clientId:
            clientSecret:
            redirectUri: "{baseUrl}/oauth2/callback/{registrationId}"
            scope:
              - email
              - profile
          naver:
            clientId:
            clientSecret:
            clientAuthenticationMethod: post
            authorizationGrantType: authorization_code
            redirectUri: "{baseUrl}/oauth2/callback/{registrationId}"
            scope:
              - nickname
              - email
              - profile_image
            clientName: Naver
          kakao:
            clientId:
            clientSecret:
            clientAuthenticationMethod: post
            authorizationGrantType: authorization_code
            redirectUri: "{baseUrl}/oauth2/callback/{registrationId}"
            scope:
              - profile_nickname
              - profile_image
              - account_email
            clientName: Kakao
미리 설정해 둔 redirectUri는 http:localhost:8443/{context-path}/oauth2/callback/{google/kakao/naver} 이렇게 된다.
로그인 서버에도 동일하게 등록해두었기 때문에 문제없이 리디렉트 될 수 있다.
http:localhost:8443/oauth2/callback/google 이런 접근이 오면 또
.oauth2Login()      // Oauth 로그인 설정
	    .authorizationEndpoint()     // 소셜 로그인 권한 받기
	        .baseUri("/oauth2/authorize/**")     // 이런 경로로 오면
	        .authorizationRequestRepository(cookieAuthorizationRequestRepository())
	        .and()
	    .redirectionEndpoint()       // 리다이렉트
	        .baseUri("/oauth2/callback/**")     // 이런 경로로 오면
.and()저기에서 필터되어 들어간다. 그러면 서버는 다시
oauth2:
    authorizedRedirectUris:
    	- <http://localhost:8443/oauth/redirect>
- <http://localhost:3000/oauth/redirect>미리 설정해 둔 “인증되었을 때 인증 서버에서부터 리다이렉트 될 주소”인 authorizedRedirectUris 로 돌아간다. 이 때 로컬 스토리지나 uri의 requestparam을 확인하면 access_token과 함께 반환됨을 확인할 수 있다.
https://github.com/callicoder/spring-boot-react-oauth2-social-login-demo 의 프로젝트를 참고하여 소셜로그인 과정을 정리해보았다.
GitHub - callicoder/spring-boot-react-oauth2-social-login-demo: Spring Boot React OAuth2 Social Login with Google, Facebook, and
Spring Boot React OAuth2 Social Login with Google, Facebook, and Github - GitHub - callicoder/spring-boot-react-oauth2-social-login-demo: Spring Boot React OAuth2 Social Login with Google, Facebook...
github.com
1. GOOGLE_AUTH_URL 이동
누르면 오른쪽 링크로 이동됨. http://localhost:8080/oauth2/authorize/google?redirect_uri=http://localhost:3000/oauth2/redirect
아마 /oauth/authorize/google 까지가 위 구글 소셜 로그인 페이지고 로그인이 완료되면 redirect_uri의 주소로 이동한다는 뜻인 듯??
그러면 SecurityConfig에서 oauth2Login으로 필터됨.
참고
2. Redirect
SecurityConfig.java
http
	.cors()
	    .and()
	.sessionManagement()
	    .sessionCreationPolicy(SessionCreationPolicy.STATELESS)
	    .and()
	.csrf()
	    .disable()
	.formLogin()
	    .disable()
	.httpBasic()
	    .disable()
	.exceptionHandling()
	    .authenticationEntryPoint(new RestAuthenticationEntryPoint())
	    .and()
		.authorizeRequests()     // 접근 권한 설정
	    .antMatchers("/auth/**", "/oauth2/**")      // 이런 경로로 들어오면
	        .permitAll()       // (인증 안받아도) 모두 접근 허용
	    .antMatchers("/",
	        "/error","/favicon.ico","/**/*.png",
	        "/**/*.gif","/**/*.svg","/**/*.jpg",
	        "/**/*.html","/**/*.css","/**/*.js")
	        .permitAll()       // 모두 접근 허용 22
	    .antMatchers("/info/**")
	        .permitAll()       // 모두 접근 허용 33
	    .anyRequest()       // 그 외 모든 경로는
	        .authenticated()       // 인증되어야 함
	    .and()
	.oauth2Login()      // Oauth 로그인 설정
	    .authorizationEndpoint()     // 소셜 로그인 권한 받기
	        .baseUri("/oauth2/authorize/**")     // 이런 경로로 오면
	        .authorizationRequestRepository(cookieAuthorizationRequestRepository())
	        .and()
	    .redirectionEndpoint()       // 리다이렉트
	        .baseUri("/oauth2/callback/**")     // 이런 경로로 오면
	        .and()
	    .userInfoEndpoint()
	        .userService(customOAuth2UserService)
	        .and()
	    .successHandler(oAuth2AuthenticationSuccessHandler)     // Oauth 로그인 성공하면
	    .failureHandler(oAuth2AuthenticationFailureHandler);     // Oauth 로그인 실패하면

// Add our custom Token based authentication filter
http.addFilterBefore(tokenAuthenticationFilter(),      // jwt 토큰 핸들러
 UsernamePasswordAuthenticationFilter.class);
(* 서버 포트를 8443으로 설정해두었음)
http://localhost:8443/oauth2/authorize/google?redirect_uri=http://localhost:3000/oauth2/redirect 는 “oauth2/authorize/**” 패턴이니까
.oauth2Login()      // Oauth 로그인 설정
	    .authorizationEndpoint()     // 소셜 로그인 권한 받기
	        .baseUri("/oauth2/authorize/**")     // 이런 경로로 오면
	        .authorizationRequestRepository(cookieAuthorizationRequestRepository())
	        .and()
여기서 걸린다.
스프링에서 알아서 로그인 서버와 통신을 끝낸 뒤에, 인증에 성공하면 access_code와 함께 redirect_url로 돌아간다.
application.yml
security:
    oauth2:
      client:
        registration:
          google:
            clientId:
            clientSecret:
            redirectUri: "{baseUrl}/oauth2/callback/{registrationId}"
            scope:
              - email
              - profile
          naver:
            clientId:
            clientSecret:
            clientAuthenticationMethod: post
            authorizationGrantType: authorization_code
            redirectUri: "{baseUrl}/oauth2/callback/{registrationId}"
            scope:
              - nickname
              - email
              - profile_image
            clientName: Naver
          kakao:
            clientId:
            clientSecret:
            clientAuthenticationMethod: post
            authorizationGrantType: authorization_code
            redirectUri: "{baseUrl}/oauth2/callback/{registrationId}"
            scope:
              - profile_nickname
              - profile_image
              - account_email
            clientName: Kakao
미리 설정해 둔 redirectUri는 http:localhost:8443/{context-path}/oauth2/callback/{google/kakao/naver} 이렇게 된다.
로그인 서버에도 동일하게 등록해두었기 때문에 문제없이 리디렉트 될 수 있다.
http:localhost:8443/oauth2/callback/google 이런 접근이 오면 또
.oauth2Login()      // Oauth 로그인 설정
	    .authorizationEndpoint()     // 소셜 로그인 권한 받기
	        .baseUri("/oauth2/authorize/**")     // 이런 경로로 오면
	        .authorizationRequestRepository(cookieAuthorizationRequestRepository())
	        .and()
	    .redirectionEndpoint()       // 리다이렉트
	        .baseUri("/oauth2/callback/**")     // 이런 경로로 오면
	        .and()
저기에서 필터되어 들어간다. 그러면 서버는 다시
oauth2:
    authorizedRedirectUris:
    	- <http://localhost:8443/oauth/redirect>
        - <http://localhost:3000/oauth/redirect>
미리 설정해 둔 “인증되었을 때 인증 서버에서부터 리다이렉트 될 주소”인 authorizedRedirectUris 로 돌아간다. 이 때 로컬 스토리지나 uri의 requestparam을 확인하면 access_token과 함께 반환됨을 확인할 수 있다.