
현재 나온 Swagger는 3.0.0까지 있지만 3.0.0은 어떻게 하는지 모르겠어서 2.6.1 기준으로 작성합니다....
부트 말고 그냥 spring framework 기준입니다. [springboot 버전->]
(참고)
프로젝트 구성입니다
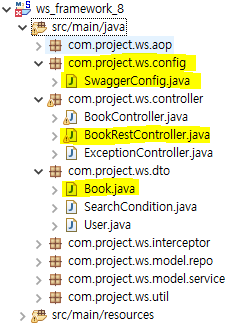
Swagger에 Book 관련된 컨트롤러를 등록해 보겠습니다.
설정 추가
1. pom.xml


프로퍼티 추가 안하고 그냥 {jackson-databind-version} 부분에 바로 2.13.2.2 적어도 됩니다.
<jackson-databind-version>2.13.2.2</jackson-databind-version>


<!-- https://mvnrepository.com/artifact/io.springfox/springfox-swagger2 -->
<dependency>
    <groupId>io.springfox</groupId>
    <artifactId>springfox-swagger2</artifactId>
    <version>2.6.1</version>
</dependency>

<!-- https://mvnrepository.com/artifact/io.springfox/springfox-swagger-ui -->
<dependency>
    <groupId>io.springfox</groupId>
    <artifactId>springfox-swagger-ui</artifactId>
    <version>2.6.1</version>
</dependency>
2. servlet-context.xml

프로젝트 구성을 보면서 경로를 잘 설정해 줍니다!
<context:component-scan base-package="com.project.ws.config"/>
<!-- swagger -->
<beans:bean id="swagger2Config" class="com.project.ws.config.SwaggerConfig"></beans:bean>
<resources location="classpath:/META-INF/resources/" mapping="swagger-ui.html"></resources>
<resources location="classpath:/META-INF/resources/webjars/" mapping="/webjars/**"></resources>
소스 코드 추가
1. 컨트롤러 어노테이션

등록하고자 하는 컨트롤러 클래스에 @Controller (혹은 @RestController), @Api 어노테이션을 붙이고 각 메소드에 @ApiOperation 어노테이션을 붙입니다. (@CrossOrigin은 Swagger와는 상관없는 어노테이션입니다. 그냥 빼고 캡쳐한다는걸 까먹음(...) 컨트롤러를 사용할 수 있는 접근 권한을 설정하는 부분입니다.)

@ApiResponses 어노테이션을 사용하면 반환되는 Response의 HttpStatus 상태에 대한 추가적인 정보를 Swagger에 등록할 수 있습니다. (필수 아님)

@RestController
@Api(value = "도서 컨트롤러 Ver.1")
public class BookRestController {
	private static final Logger logger = LoggerFactory.getLogger(BookController.class);

	@Autowired
	BookService bService;

	// insert
	@ApiOperation(value = "도서 등록", notes = "도서 등록")
	@ApiResponses({
		@ApiResponse(code=200, message="정상 등록"),
		@ApiResponse(code=404, message="주소 오류"),
		@ApiResponse(code=500, message="내부 서버 오류")
	})
	@PostMapping("/book")
	public ResponseEntity<?> doRegist(@RequestBody Book book) throws IOException {
		try {
			bService.insert(book);
			return new ResponseEntity<Void>(HttpStatus.OK);
		} catch(Exception e) {
			return new ResponseEntity<Void>(HttpStatus.INTERNAL_SERVER_ERROR);
		}
	}
}
2. 컨트롤러 등록하기
com.project.ws.config 패키지 내에 SwaggerConfig.java 파일을 만든다.

프로젝트 구성을 보면서 경로를 잘 설정해 줍니다!
regex("/.*") 이 부분은 Swagger에 등록하고자 하는 컨트롤러의 경로를 일부 저장하는 부분인데,

regex("/book/.*") 이렇게 작성된다면 위의 컨트롤러처럼 /book 이하의 uri와 매핑된 컨트롤러만 등록하겠다는 의미입니다. basePackage에 존재하는 모든 컨트롤러를 등록하고 싶다면 위의 코드처럼 regex("/.*") 요렇게 적어주면 됩니다.
그러면
이런식으로 ws.controller 패키지에 있는 모든 컨트롤러들이 등록됩니다.

package com.project.ws.config;
import static springfox.documentation.builders.PathSelectors.regex;
import org.springframework.context.annotation.Bean;
import springfox.documentation.builders.ApiInfoBuilder;
import springfox.documentation.builders.RequestHandlerSelectors;
import springfox.documentation.service.ApiInfo;
import springfox.documentation.spi.DocumentationType;
import springfox.documentation.spring.web.plugins.Docket;
import springfox.documentation.swagger2.annotations.EnableSwagger2;
@EnableSwagger2
public class SwaggerConfig {
@Bean
public Docket api() {
final ApiInfo apiInfo = new ApiInfoBuilder()
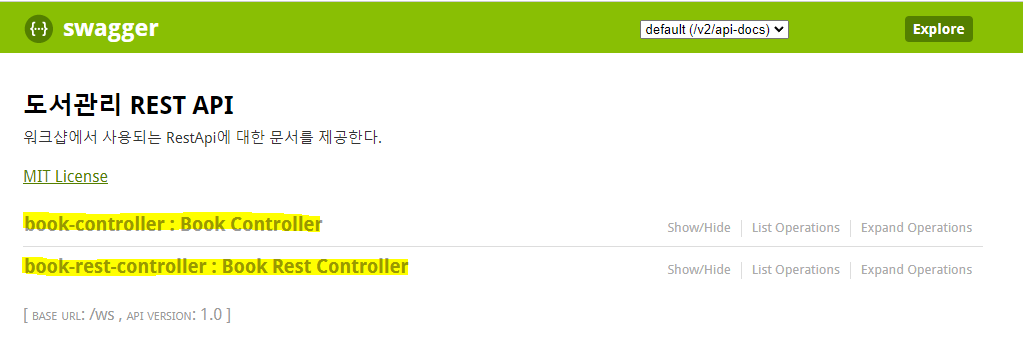
.title("도서관리 REST API")
.description("<h3>워크샵에서 사용되는 RestApi에 대한 문서를 제공한다.</h3>")
.license("MIT License")
.version("1.0")
.build();
return new Docket(DocumentationType.SWAGGER_2)
.apiInfo(apiInfo)
.select()
.apis(RequestHandlerSelectors.basePackage("com.project.ws.controller"))
.paths(regex("/.*"))
.build();
}
}
Swagger 주소 접속
참고로 Swagger-UI의 버전에 따라 접속해야하는 주소가 다릅니다.
Swagger-UI 2.x ) http://localhost:8080/{root-context}/swagger-ui.html
Swagger-UI 3.x ) http://localhost:8080/{root-context}/swagger-ui/index.html
우리는 2.6.1 버전을 사용했기 때문에 위의 링크로 들어갑니다!
그러면 아래와 같은 문서를 확인할 수 있습니다.
